Configure the Japanese keyboard on Arch Linux▁
Prerequistes#
Fonts#
By default, the system lacks Japanese fonts. Therefore, installing at least one font is necessary to properly display kana and kanji characters.
I recommend using the Noto font, as it is fairly complete and distributed under a free (as in freedom) license.
sudo pacman -S --needed noto-fonts noto-fonts-cjk
The first package will install the “base” font containing letters (Latin, Cyrillic, …), while the second package focuses on logographs (kanji, hanzi, hanja, …).
More fonts can be found on the Arch Wiki. A selection of fonts can also be found on Tatsumoto Ren’s blog.
Be careful as some characters are written differently in Chinese and Japanese! For instance, the
直character lacks a vertical stroke on the left in Chinese1.
Japanese locale#
Locales are used by the system to render fonts and format regional-specific elements (money, dates, time, …). If a locale is missing, some font rendering issues might occur2.
A locale can be added to the system via the /etc/locale.gen file, which is as a reference by the system when generating locales. To add the Japanese locale, uncomment the ja_JP.UTF8 UTF8 by removing the leading #. Do not disable any already enabled locales.
sudo vim /etc/locale.gen
The file content should look something like this:
# File: /etc/locale.gen
# ...
#iu_CA UTF-8
#ja_JP.EUC-JP EUC-JP
ja_JP.UTF-8 UTF-8
#ka_GE.UTF-8 UTF-8
#ka_GE GEORGIAN-PS
# ...
Once the line has been uncommented, save the file and run the following command to generate locales.
sudo locale-gen
You can then check if the Japanese locale has been properly enabled by listing all enabled locales using the locale -a command. The locale has been properly generated if ja_JP.utf8 is present in the list.
For reference, here is the output I get on my system:
[akari@nyarch ~]$ locale -a
C
C.utf8
en_US.utf8
fr_CH.utf8
ja_JP.utf8
POSIX
Japanese keyboard#
Components#
A Japanese keyboard requires two compenents to work correctly:
- An input method editor (IME), which converts Latin script into kana and kanji.
- An input method framework (IMF) to let the user switch between IMEs.
There are two IMFs: IBus and Fctix5. The former is most commonly used on GTK-based environments such as GNOME or Mate, while the latter is preferred on Qt-based environments like KDE Plasma or LXQt. Both framework are compatible with all IMEs.
The most commonly recommended IME seems3 to be Mozc, which is the one I personnally use. It is an open-source project based on Google Japanese Input.
GTK#
On GTK-based environments, the ibus and ibus-mozc packages must be installed. Note that the former is available in the official Arch Linux repositories, while the latter must be installed from the AUR.
sudo pacman -S ibus
paru -S ibus-mozc
Then, four environment variables must be added. This can be done by adding the following lines to the ~/.config/environment.d/envvars.conf file (can be created if it does not exist).
# File $HOME/.config/environment.d/envvars.conf
# /!\ Works only on Wayland sessions /!\
GTK_IM_MODULE=ibus
QT_IM_MODULE=ibus
XMODIFIERS=@im=ibus
MOZC_IBUS_CANDIDATE_WINDOW=ibus
Qt#
On Qt-based environments, the packages fcitx5-im and fcitx5-mozc must be installed. Both can be found in the official Arch Linux repositories.
sudo pacman -S fcitx5-im fcitx5-mozc
With Fcitx5, only three environment variables are required. These can also be placed in the ~/.config/environment.d/envvars.conf file, which can be created if it does not exists.
# File $HOME/.config/environment.d/envvars.conf
# /!\ Works only on Wayland sessions /!\
GTK_IM_MODULE=fcitx
QT_IM_MODULE=fcitx
XMODIFIERS=@im=fcitx
Note that the environment variables for Fcitx do not include “5” in their values!
Usage#
Once everything has been installed an configured, the Japanese keyboard can be used.
Adding a new keyboard differs depending on the desktop environment or window manager / compositor. On GNOME-based systems, an input method can be added through the Keyboard section of the Settings application.
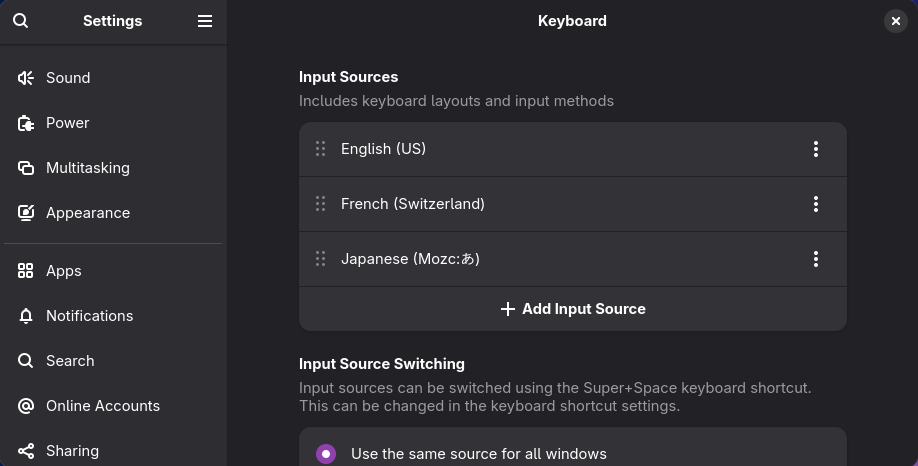
Keyboard settings on GNOME.
Then, click on Add input source and choose Japanese.
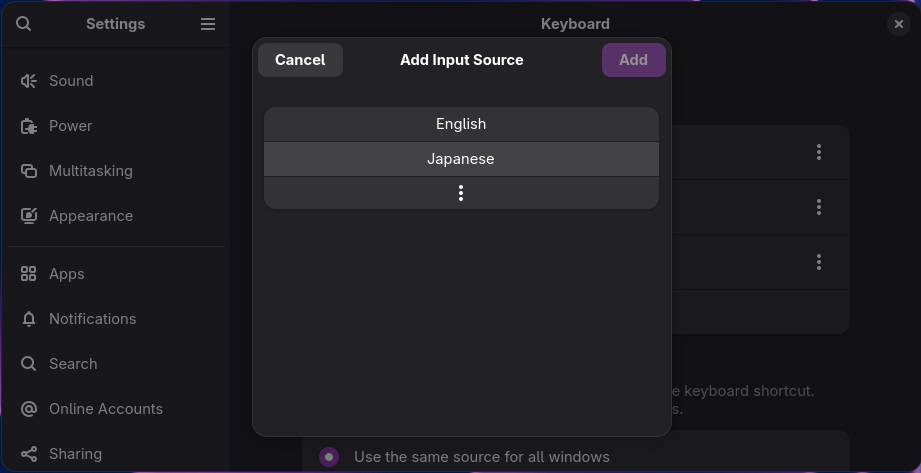
Choosing the Japanese input source.
Finally, scroll to “Japanese (Mozc:あ)”. This variants defaults the keyboard to kana input instead of roumaji.
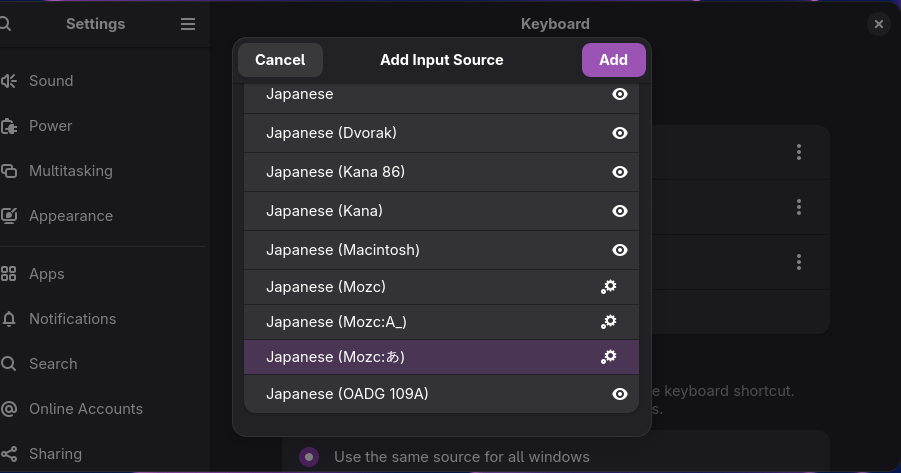
Selecting the Japanese (Mozc:あ) keyboard.
To change input method, the keyboard shortcut <super> + <space> can be used. When text is typed, a list of word suggestions appear.
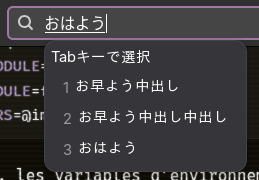
The words list.
One can navigate through that list using the <space> key. An entry can be selected using <enter>.
Wiktionary, 直 - Alternative forms ↩︎
Archwiki, Localization/Japanese ↩︎